 ScopeFoundry
A Python platform for controlling custom laboratory experiments and visualizing scientific data
A Python platform for controlling custom laboratory experiments and visualizing scientific data
Note: We recommend the Anaconda Python distribution, which contains many easy-to-install scientific python packages.
Download and Install Anaconda. The recommended Python version is 3.6, but 2.7 may also work (but is currently untested). If you already had a non-Anaconda version of python installed, you will need to make sure you use Anaconda if you would like to follow the instructions below.
Anaconda provides a way to make a clean set of packages in an “environment”. Follow these steps to create an conda environment. This environment includes ScopeFoundry and all of the packages ScopeFoundry needs to run.
Windows
Open an Anaconda prompt and run the following commands:
> conda create -n scopefoundry python=3.6
> activate scopefoundry
(scopefoundry) > conda install numpy pyqt qtpy h5py pyqtgraph
(scopefoundry) > pip install ScopeFoundry
The first two lines create and activate a clean python / conda environment for your ScopeFoundry app to use, the next lines install the required packages and the final line install the ScopeFoundry package itself.
The use of the conda environment is optional, but provides a clean, known working environment for ScopeFoundry
Mac / Linux
Open a terminal and run the following commands:
$ conda create -n scopefoundry python=3.6
$ source activate scopefoundry
(scopefoundry) $ conda install numpy pyqt qtpy h5py pyqtgraph
(scopefoundry) $ pip install ScopeFoundry
The first two lines create and activate a clean python / conda environment for your ScopeFoundry app to use, the next lines install the required packages and the final line install the ScopeFoundry package itself.
Make a directory (folder) for you microscope, say fancy_microscope, and create a file inside called fancy_microscope.py(A complete version of this file is available here). Copy and paste the following content into this file and save it.
This file tells ScopeFoundry all about your microscope – like any hardware and measurement components that are part of your microscope setup.
ScopeFoundry assumes a few basic things about your microscope, but not many. The basic assumptions it makes are part of BaseMicroscopeApp python class, which we import here.
When you define your microscope app, FancyMicroscopeApp, it inherits from its parent class, BaseMicroscopeApp. You then you add your own bells and whistles in your setup() method. The code below has comments about what we can do during setup, but so far is left blank.
If you run this file as a python script, the last few lines tell python to create an instance of FancyMicroscopeApp and then run it.
from ScopeFoundry import BaseMicroscopeApp

class FancyMicroscopeApp(BaseMicroscopeApp):

    # this is the name of the microscope that ScopeFoundry uses
    # when storing data
    name = 'fancy_microscope'

    # You must define a setup function that adds all the
    #capablities of the microscope and sets default settings
    def setup(self):

        #Add App wide settings

        #Add hardware components
        print("Adding Hardware Components")

        #Add measurement components
        print("Create Measurement objects")

        # Connect to custom gui

        # load side panel UI

        # show ui
        self.ui.show()
        self.ui.activateWindow()


if __name__ == '__main__':
    import sys

    app = FancyMicroscopeApp(sys.argv)
    sys.exit(app.exec_())
Let’s test our empty microscope app:
in your terminal window: python fancy_microscope_app.py and you will be greeted something like this:
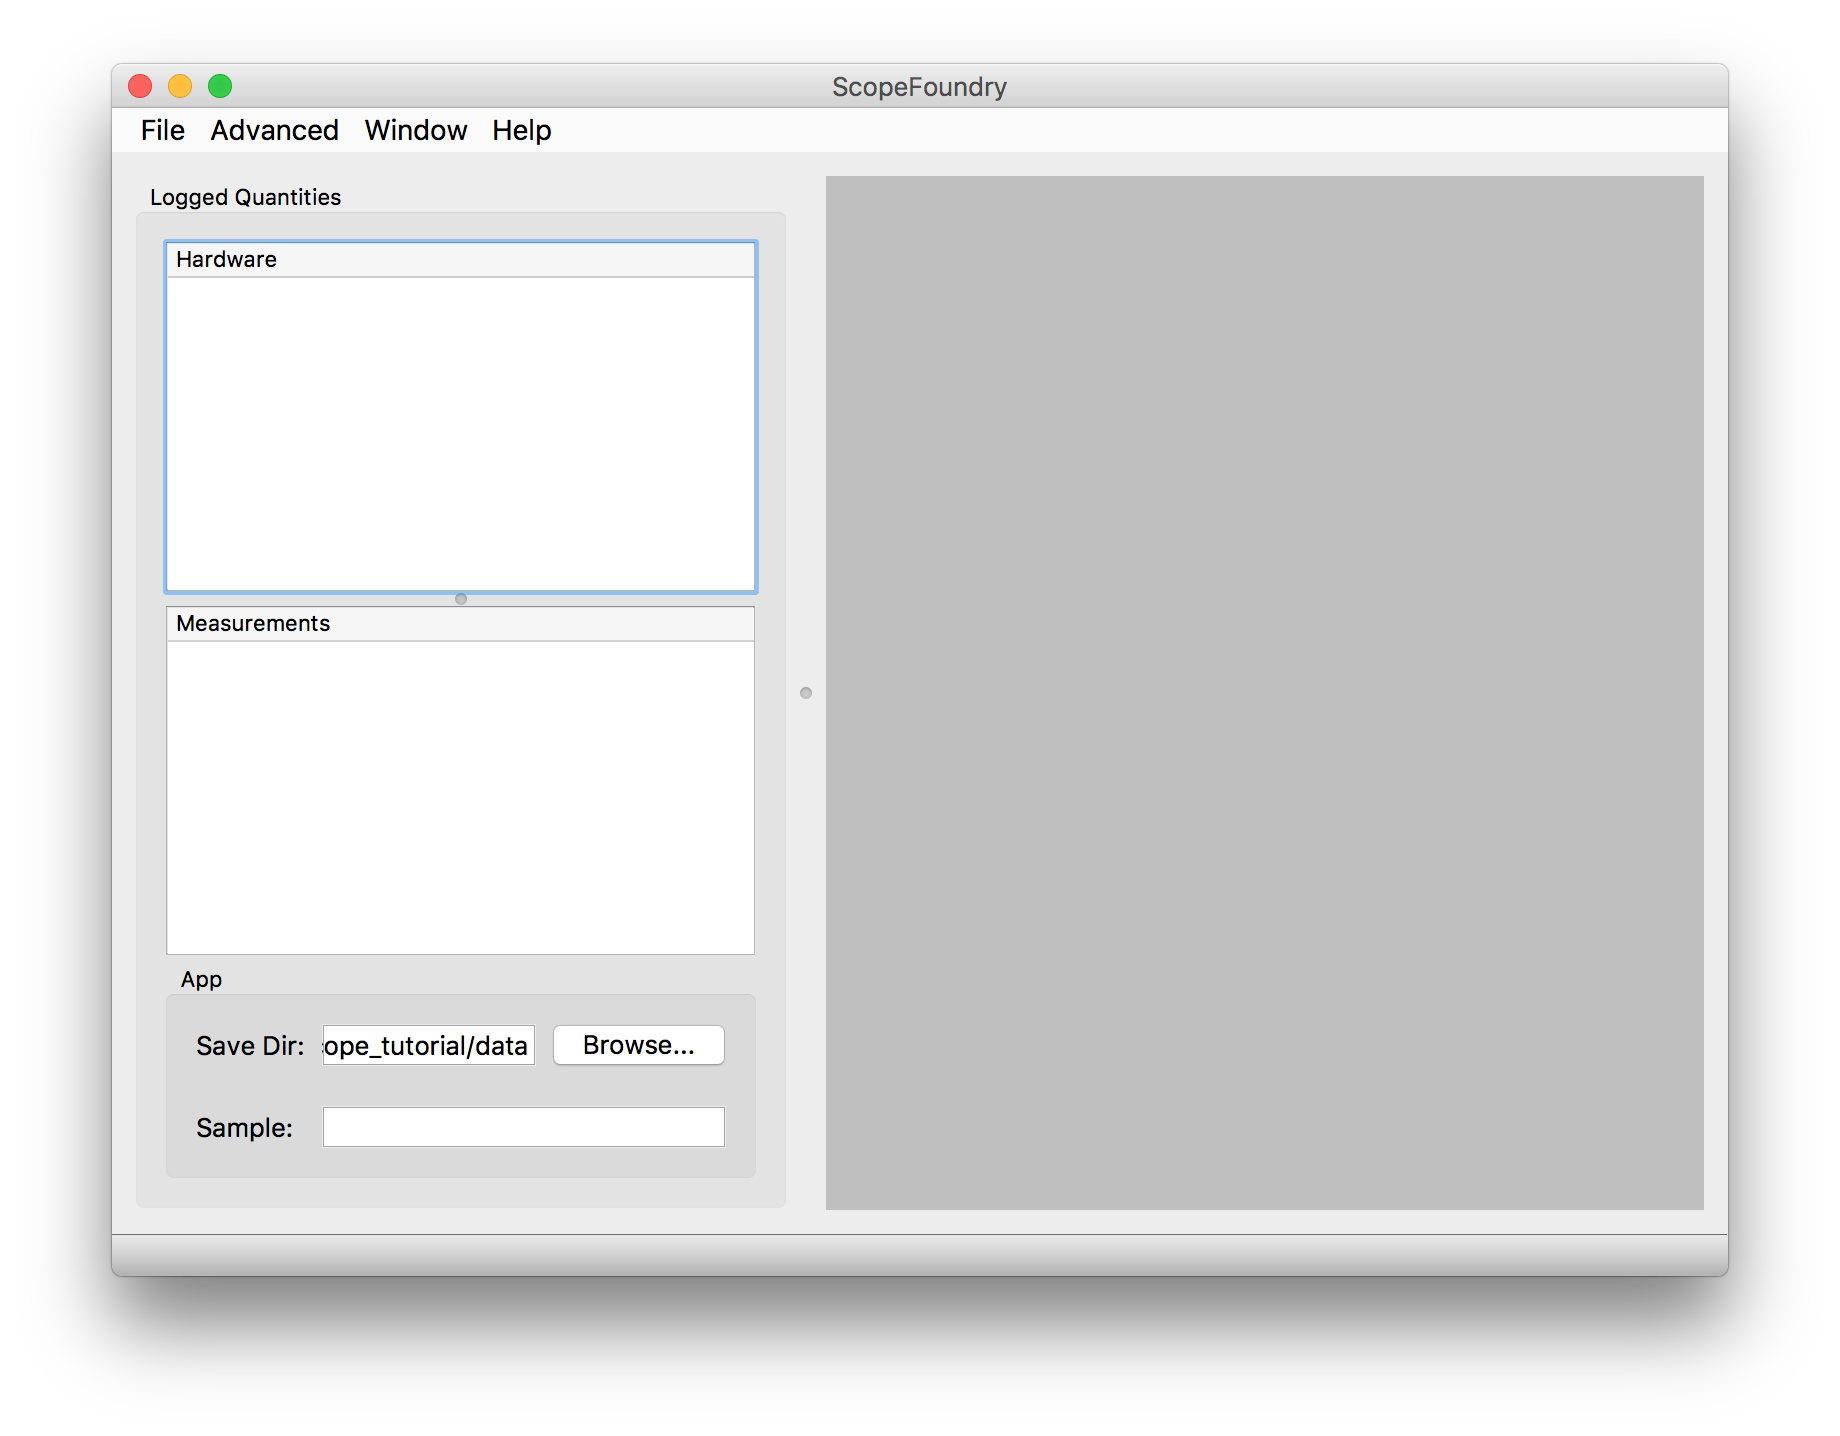
In the next step we’ll tell you how to add some pre-built bells and whistles to make this more useful. (Yes, we know, you want custom ones. We’ll teach you how to do that, too!)
Now, we will learn how to add piece of hardware to your microscope. We have a virtual function generator that acts like an analog input attached to a function generator that makes sine and square waves. Let’s install this package which is available on the ScopeFoundry GitHub project:
(scopefoundry) $ pip install git+https://github.com/ScopeFoundry/HW_virtual_function_gen.git
Now python has access to the functions and modules provided by this package.
Add the hardware component to your microscope app by adding these lines to your app’s setup() function:
    def setup(self):
        ...
        #Add Hardware components
        from ScopeFoundryHW.virtual_function_gen.vfunc_gen_hw import VirtualFunctionGenHW
        self.add_hardware(VirtualFunctionGenHW(self))
        ...
We need two lines in the setup function to use this hardware component. The first line tells python where to find the hardware component, via an import statement. The next line creates an instance of the hardware (an active copy in memory), and then adds it to your App.
Notice that ScopeFoundry Hardware components always have the suffix “HW”.
The virtual_function_gen package also provides a way to capture the data, display and save the data from the our new hardware component. This is encapuslated in a ScopeFoundry Measurement class. Let’s include a sine_wave_plot measurement in our App by adding a couple lines to our setup() function:
    def setup(self):
        ...
        #Add Measurement components
        from ScopeFoundryHW.virtual_function_gen.sine_wave_measure import SineWavePlotMeasure
        self.add_measurement(SineWavePlotMeasure(self))
        ...
Notice that ScopeFoundry Measurement class names always have the suffix “Measure”.
Now that we have the basics of our app. We can open it, run our measurement and save some data.
Again, in your terminal window: python fancy_microscope_app.py and you will be greeted something like this:
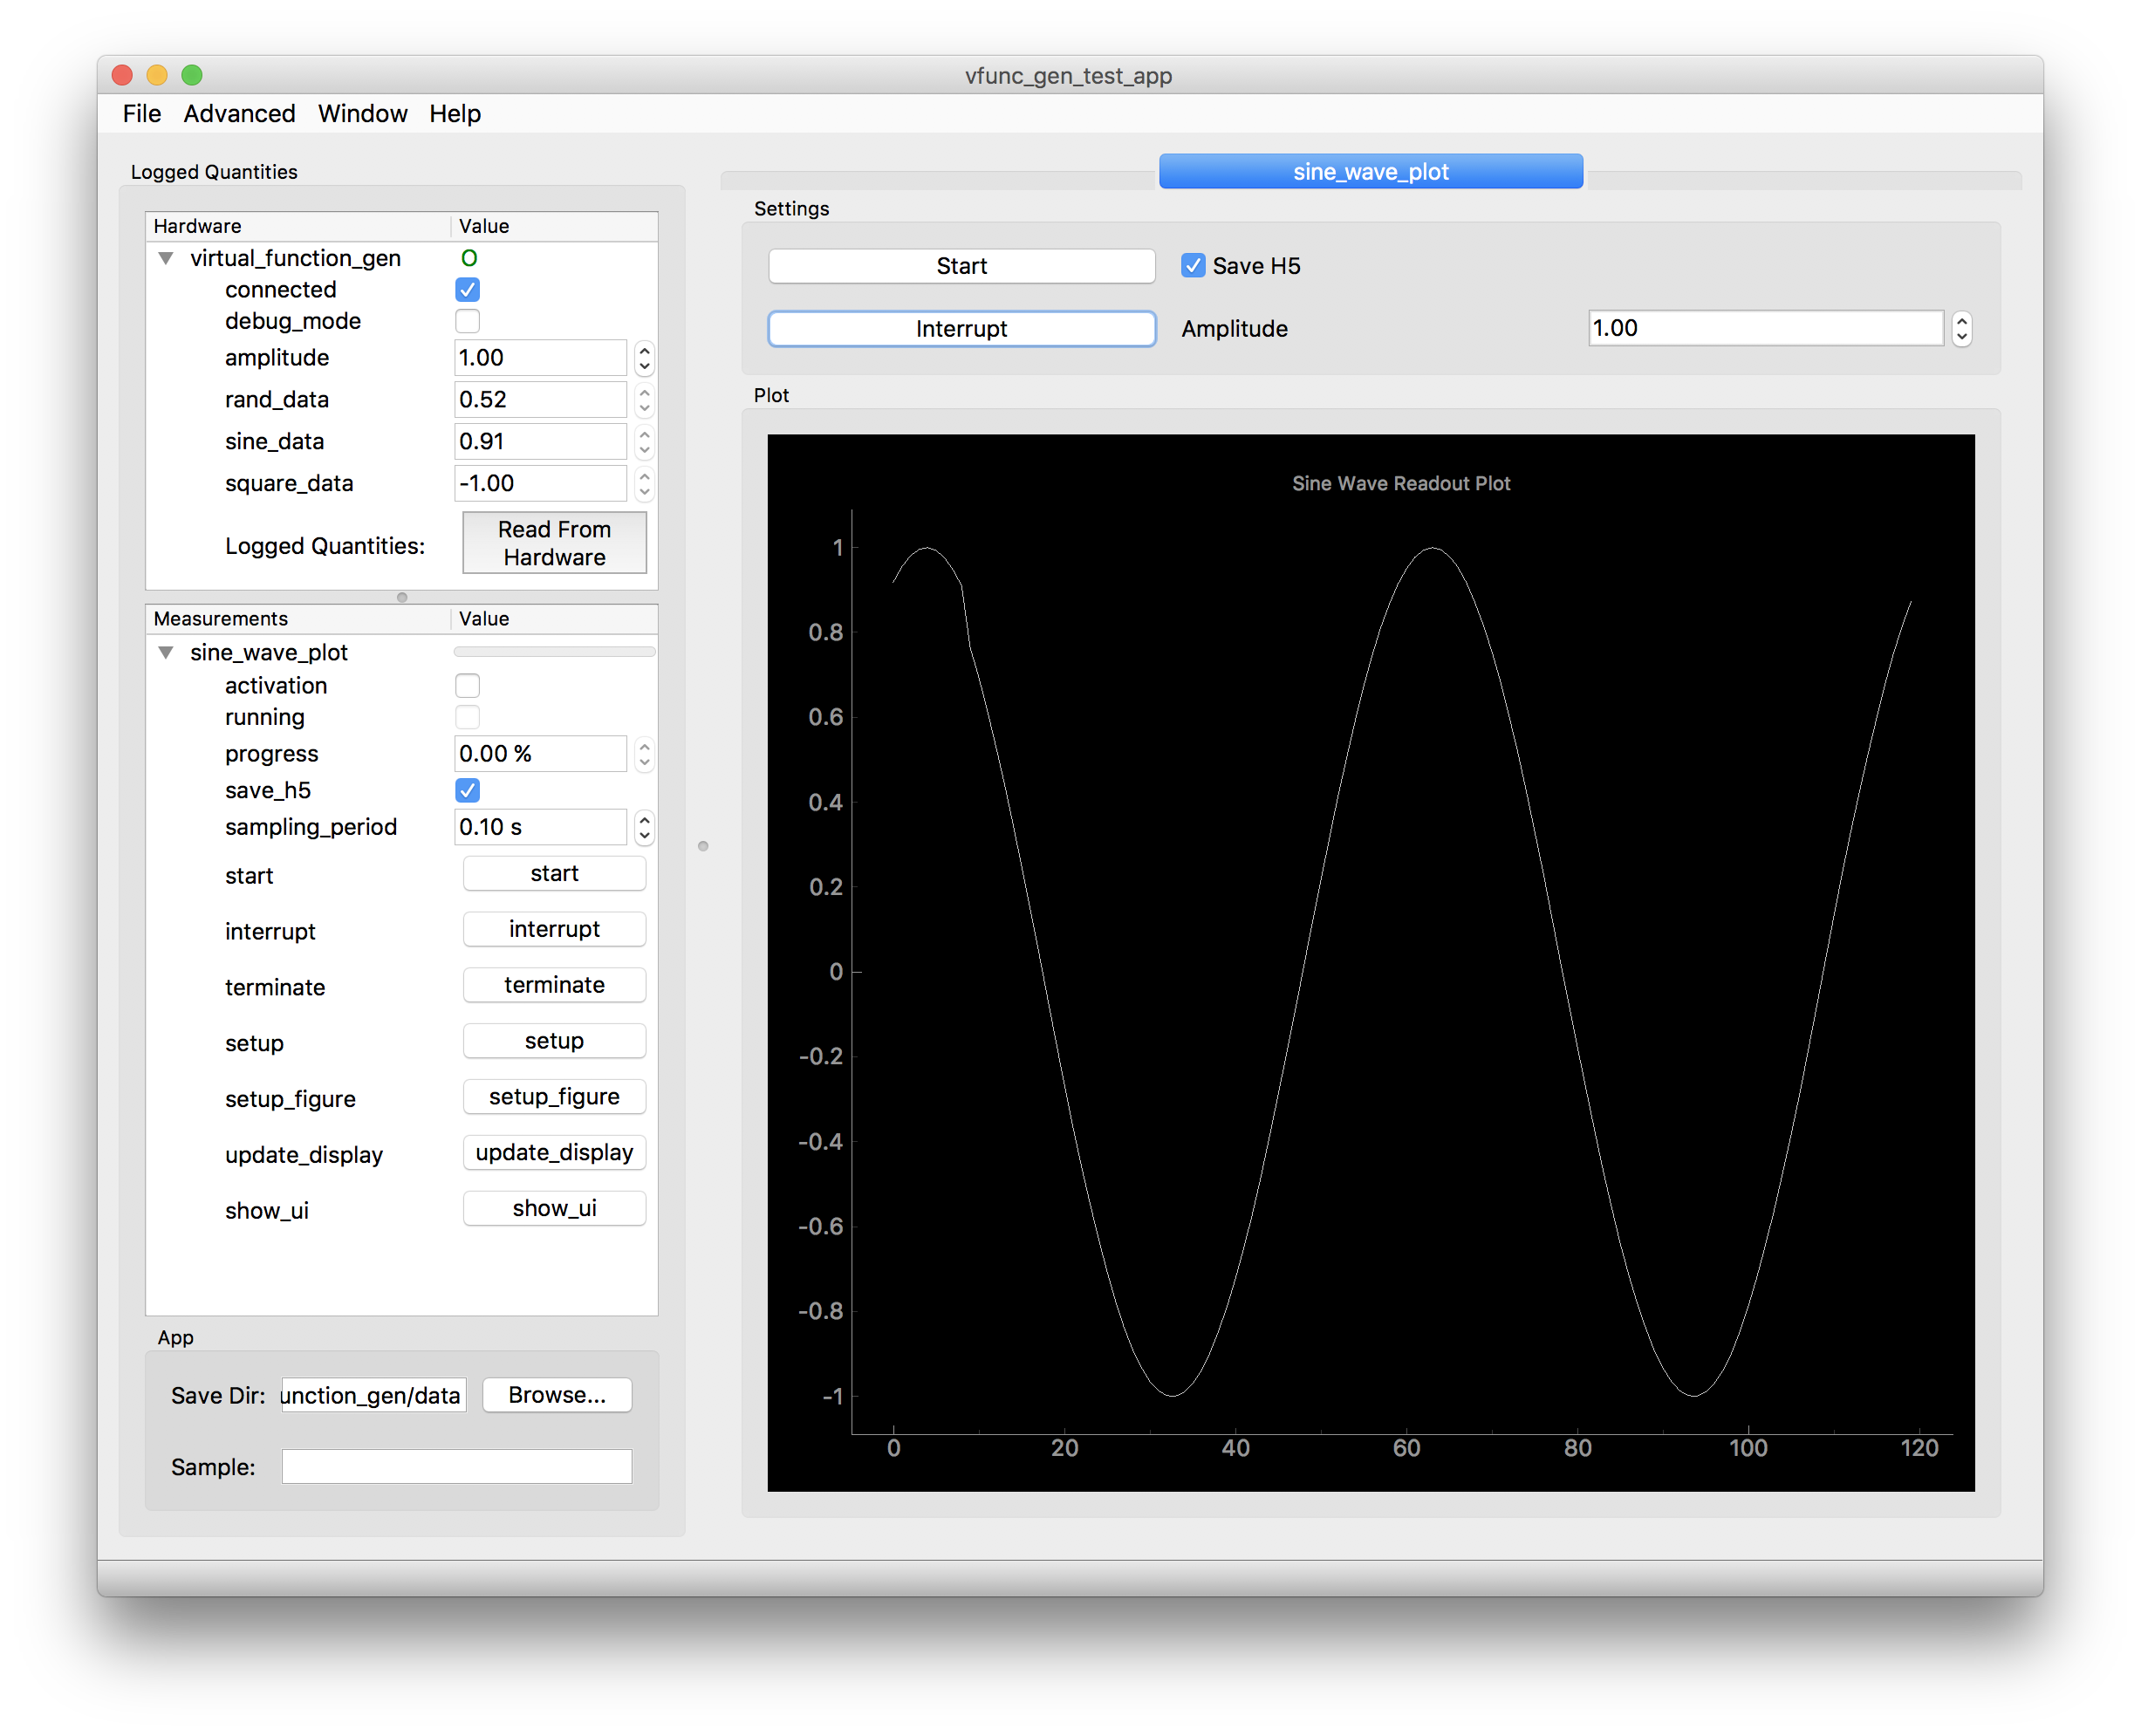
In this graphical interface we do the following:
virtual_function_gen hardware component)
virtual_function_gen section of the Hardware treeconnected checkboxvirtual_function_gen section of the Hardware tree, set the amplitudedata/ folder inside the App directory.sine_wave_plot section of the Measurements treesampling_period settingactivation checkbox, or click on the start button.interrupt button or unchecking activationThe measurement will auto-save a data-file that contains the optimizer history to an HDF5 (.h5) data file within the specified Save Directory. This data file contains the data along with data structures that include all the meta-data from the microscope App. To view this data file, we can use a graphical viewer HDFView, or use the FoundryDataBrowser from the ScopeFoundry project.
The data file created by the sine_wave_plot measurement has the following hierarchy:
|> app
    |- name = vfunc_gen_test_app
    |- ScopeFoundry_type = App
    |> settings
        |- save_dir = ~/fancy_microscope/data
        |- sample = Test Sample 42
        |> units
|> hardware
    |- ScopeFoundry_type = HardwareList
    |> virtual_function_gen
        |- name = virtual_function_gen
        |- ScopeFoundry_type = Hardware
        |> settings
            |- connected = True
            |- debug_mode = False
            |- amplitude = 1.0
            |- rand_data = 0.5191185618096453
            |- sine_data = 0.9099735972719286
            |- square_data = -1.0
            |> units
|> measurement
    |> sine_wave_plot
        |- name = sine_wave_plot
        |- ScopeFoundry_type = Measurement
        |D buffer: (120,) float64
        |> settings
            |- activation = False
            |- running = True
            |- progress = 50.0
            |- save_h5 = True
            |- sampling_period = 0.1
            |> units
                |- progress = %
                |- sampling_period = s
You will notice that this data file contains much more than just the sine wave data recorded during your measurement. It also contains all the settings of the hardware and measurement conditions at the time of the data acquisition.
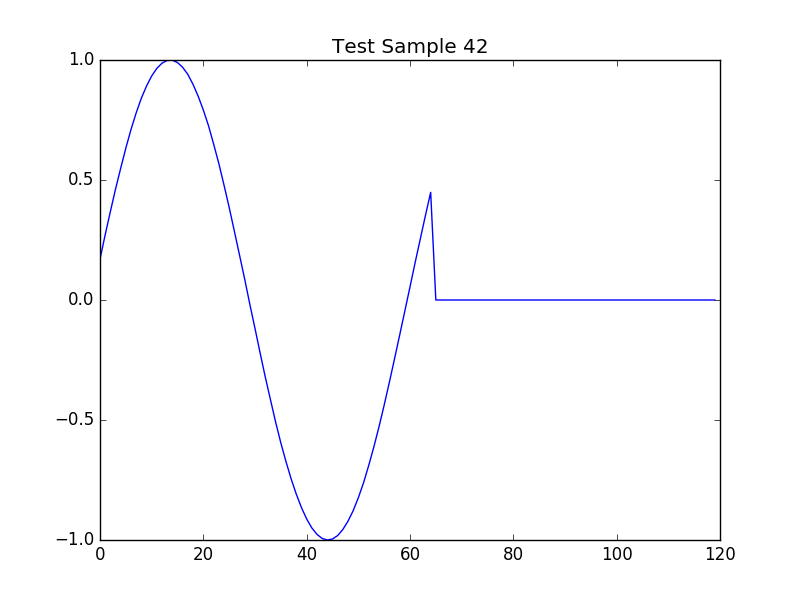
We can access this data file in Python using the h5py package.
import h5py

dat = h5py.File('1486144636_sine_wave_plot.h5', 'r')

sample_name = dat['app/settings'].attrs['sample']
print(sample_name)
# Test Sample 42

buffer_data = dat['measurement/sine_wave_plot/buffer']

import matplotlib.pyplot as plt
plt.title(sample_name)
plt.plot( buffer_data)
plt.savefig('sine_wave_data_plot_42.png')
plt.show()
Now that you have interacted with ScopeFoundry and built a microscope app with pre-built components, you probably would like to build a system that allows you to do real scientific experiements. To do this we need to build custom measurement types and potentially new hardware components for ScopeFoundry.
See these tutorials for a more detailed look into how to customize your microscope with ScopeFoundry:
This tutorial code is here: fancy_microscope_app.py
The package that includes the hardware and measurement components used in this tutorial are available in this code repository: virtual_function_gen.
For questions about this tutorial or ScopeFoundry in general, please visit and post on the ScopeFoundry project mailing list and forum.
For source code of all ScopeFoundry projects visit our GitHub page.